Mediaboards are 2D items that can be placed anywhere in a space that allow you to embed and display various forms of traditional content from outside the platform.
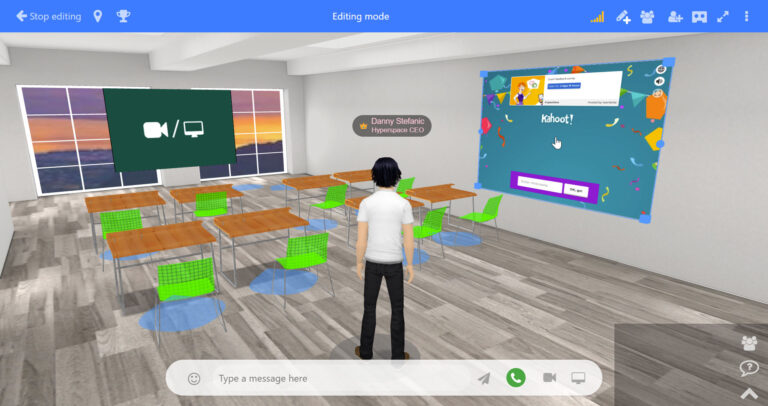
Mediaboards can be used to display:
Media type | Supported file types |
Images | JPG, PNG, WEBP |
Videos | MP4, m3u8 |
Slideshows | |
Website links | URL |
SCORM courses | HTML |
Webcam | |
Screenshare | |
Forms | |
Miro, Articulate, Sharepoint, Office 365, Google Docs… |
and 100+ more integrations
Jump to:
Mediaboard shows “Rendering…” even after a couple of hours
What pixel size should mediaboard thumbnails be?
How to play and pause a video mediaboard?
How to autoplay a video mediaboard?
Why does website XYZ open in a new tab instead of directly in the 3D environment?
Can I show a thumbnail? My video mediaboard is black until I click on it!
How can I share my Camera when using Samsung DeX?
Showing an image when clicking on a mediaboard
I have the images but they are not online – where can I upload them?
Adding a video through the chat (“pinning”)
How to upload and play an .mp4 video as a texture in the 3d scene
Best performance for uploaded videos (mp4 to m3u8 service)
Disable suggested videos when pausing or at the end
Video textures (MP4, YouTube, Vimeo) on IE11 (2.8+)
Using the Avatar as Videoboard feature
Stop Avatar as Videoboard feature
Stop Avatar as Videoboard for Presenters
Pre-recorded Videos as Holograms
Chrome Browser Sharing Options
Extension for Chrome (prior to version 70)
FAQs
How do I resize mediaboards?
Scale by grabbing the corners of an item in edit mode and dragging them to resize.
Or, you can also manually adjust the scale in a mediaboard’s settings.
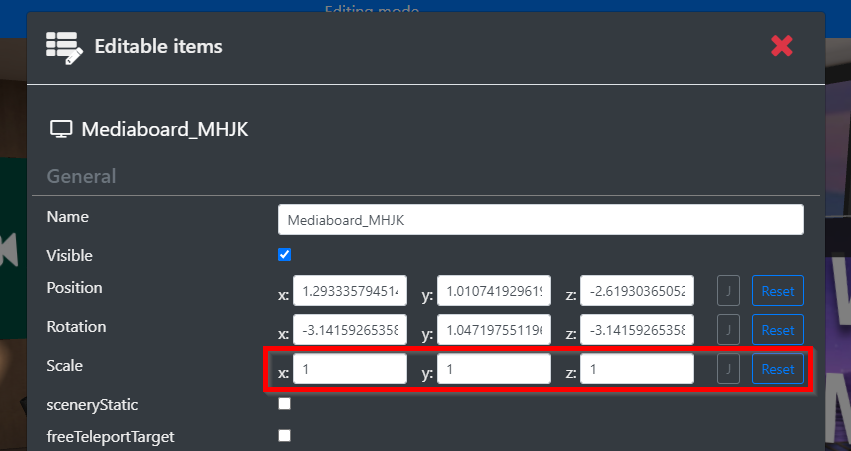
- Pencil+ > Show Items List
- Find your mediaboard
- Click Edit
- In the scale field change
{"x":1,"y":1,"z":1}
To larger
{"x":2.4,"y":2.4,"z":2.4}
Or smaller
{"x":0.2,"y":0.2,"z":0.2}
Mediaboard shows “Rendering…” even after a couple of hours
For particular types of content such as webpages the platform will visit the website and take a snapshot picture to display on the linked mediaboard. This process may take a moment, while it does the snapshot “Rendering…” will be displayed on the mediaboard in the meantime.
If the mediaboard never shows a captured image, ensure the url starts with `https://` or `http://` when creating the mediaboard in order to get the capture image, otherwise you’ll need to delete and create it again.
What pixel size should mediaboard thumbnails be?
You can make the image whatever pixel dimensions you wish, as long as it maintains that ratio it will not look distorted.
It is recommended to aim for a maximum pixel size on the largest dimension of 512 pixels.
How to play and pause a video mediaboard?
See Video Play & Pause below.
How to autoplay a video mediaboard?
See Autoplay below.
Why does website XYZ open in a new tab instead of directly in the 3D environment?
If a website does not allow iframing / embedding (Banks, for instance) due to its configured security policies, it will need to be opened in a new tab. Any website that can be iframed will be, and for sites that cannot the platform will show a link to open the website in another browser tab.
Are GIFs supported?
GIFs are not supported for mediaboards. The suggested way to get animated content in the 3D environment is to use a video, or to use the method described below to use a series of images.
How to show a thumbnail? The video mediaboard is black until clicked
See Setting a thumbnail below.
How to share the webcam when using Samsung DeX?
If you never accepted the permission to access your camera on your Samsung device, when you try to share in the Samsung DeX mode, you will see the message: This site can’t ask for your permission.
You need to Exit DeX and accept Android’s permission request in a normal tablet/phone mode. Once you go back to DeX, camera sharing will work as expected.
Images
This section assumes you know how to edit a mediaboard – if not, you can learn how to do so in the “Introduction to Editing” guide, specifically under the “Changing the image on a mediaboard” section. |
Supported formats
JPG are preferred as they compress well and improve loading times.
JPG,PNG, WEBP
Image size recommendations
It is recommended to aim for a maximum pixel size on the largest dimension of 512 pixels.
Show an image when clicking on a mediaboard
Display an image as a mediaboard by using the image’s URL in the “Add mediaboard” menu.
It is also possible to show the image in a popup when clicking on it, by setting its click action to use the displayImage action, like so:
{"action":"displayImage", "url":"<YOUR_IMAGE_URL>", "position":"center-large"} |
Transparent PNGs
To enable transparency for a PNG image edit its properties and enable the transparent checkbox.
Animated mediaboards
Using multiple images
It is possible to show an “animation” by using a set of images instead of a single one.
You will need to edit the diffuseMap field of the mediaboard, inserting an array of images. Normally diffuseMap might look like this:
https://cache.learnbrite.com/_assets_/clients/learnbrite/mootup/img/slideshow/slide1.jpg |
But in this case we will need a URL for each “frame” of the animation, for example:
https://cache.learnbrite.com/_assets_/clients/learnbrite/mootup/img/slideshow/slide1.jpg https://cache.learnbrite.com/_assets_/clients/learnbrite/mootup/img/slideshow/slide2.jpg https://cache.learnbrite.com/_assets_/clients/learnbrite/mootup/img/slideshow/slide3.jpg https://cache.learnbrite.com/_assets_/clients/learnbrite/mootup/img/slideshow/slide4.jpg https://cache.learnbrite.com/_assets_/clients/learnbrite/mootup/img/slideshow/slide5.jpg https://cache.learnbrite.com/_assets_/clients/learnbrite/mootup/img/slideshow/slide15.jpg https://cache.learnbrite.com/_assets_/clients/learnbrite/mootup/img/slideshow/slide6.jpg https://cache.learnbrite.com/_assets_/clients/learnbrite/mootup/img/slideshow/slide7.jpg https://cache.learnbrite.com/_assets_/clients/learnbrite/mootup/img/slideshow/slide8.jpg https://cache.learnbrite.com/_assets_/clients/learnbrite/mootup/img/slideshow/slide9.jpg https://cache.learnbrite.com/_assets_/clients/learnbrite/mootup/img/slideshow/slide10.jpg https://cache.learnbrite.com/_assets_/clients/learnbrite/mootup/img/slideshow/slide11.jpg https://cache.learnbrite.com/_assets_/clients/learnbrite/mootup/img/slideshow/slide12.jpg https://cache.learnbrite.com/_assets_/clients/learnbrite/mootup/img/slideshow/slide13.jpg https://cache.learnbrite.com/_assets_/clients/learnbrite/mootup/img/slideshow/slide14.jpg |
To format this properly, we will need to:wrap each of the lines in quotes, separate them with a comma, and finally wrap everything together with a pair of square brackets. In order:
- Wrap each line in quotation marks, add a comma after each line but the last
"https://cache.learnbrite.com/_assets_/clients/learnbrite/mootup/img/slideshow/slide1.jpg", "https://cache.learnbrite.com/_assets_/clients/learnbrite/mootup/img/slideshow/slide2.jpg", "https://cache.learnbrite.com/_assets_/clients/learnbrite/mootup/img/slideshow/slide3.jpg", "https://cache.learnbrite.com/_assets_/clients/learnbrite/mootup/img/slideshow/slide4.jpg", "https://cache.learnbrite.com/_assets_/clients/learnbrite/mootup/img/slideshow/slide5.jpg", "https://cache.learnbrite.com/_assets_/clients/learnbrite/mootup/img/slideshow/slide15.jpg", "https://cache.learnbrite.com/_assets_/clients/learnbrite/mootup/img/slideshow/slide6.jpg", "https://cache.learnbrite.com/_assets_/clients/learnbrite/mootup/img/slideshow/slide7.jpg", "https://cache.learnbrite.com/_assets_/clients/learnbrite/mootup/img/slideshow/slide8.jpg", "https://cache.learnbrite.com/_assets_/clients/learnbrite/mootup/img/slideshow/slide9.jpg", "https://cache.learnbrite.com/_assets_/clients/learnbrite/mootup/img/slideshow/slide10.jpg", "https://cache.learnbrite.com/_assets_/clients/learnbrite/mootup/img/slideshow/slide11.jpg", "https://cache.learnbrite.com/_assets_/clients/learnbrite/mootup/img/slideshow/slide12.jpg", "https://cache.learnbrite.com/_assets_/clients/learnbrite/mootup/img/slideshow/slide13.jpg", "https://cache.learnbrite.com/_assets_/clients/learnbrite/mootup/img/slideshow/slide14.jpg" |
2. Put them on a single line, and wrap it in square brackets
["https://cache.learnbrite.com/_assets_/clients/learnbrite/mootup/img/slideshow/slide1.jpg","https://cache.learnbrite.com/_assets_/clients/learnbrite/mootup/img/slideshow/slide2.jpg","https://cache.learnbrite.com/_assets_/clients/learnbrite/mootup/img/slideshow/slide3.jpg","https://cache.learnbrite.com/_assets_/clients/learnbrite/mootup/img/slideshow/slide4.jpg","https://cache.learnbrite.com/_assets_/clients/learnbrite/mootup/img/slideshow/slide5.jpg","https://cache.learnbrite.com/_assets_/clients/learnbrite/mootup/img/slideshow/slide15.jpg","https://cache.learnbrite.com/_assets_/clients/learnbrite/mootup/img/slideshow/slide6.jpg","https://cache.learnbrite.com/_assets_/clients/learnbrite/mootup/img/slideshow/slide7.jpg","https://cache.learnbrite.com/_assets_/clients/learnbrite/mootup/img/slideshow/slide8.jpg","https://cache.learnbrite.com/_assets_/clients/learnbrite/mootup/img/slideshow/slide9.jpg","https://cache.learnbrite.com/_assets_/clients/learnbrite/mootup/img/slideshow/slide10.jpg","https://cache.learnbrite.com/_assets_/clients/learnbrite/mootup/img/slideshow/slide11.jpg","https://cache.learnbrite.com/_assets_/clients/learnbrite/mootup/img/slideshow/slide12.jpg","https://cache.learnbrite.com/_assets_/clients/learnbrite/mootup/img/slideshow/slide13.jpg","https://cache.learnbrite.com/_assets_/clients/learnbrite/mootup/img/slideshow/slide14.jpg"] |
Finally, we can add this to the diffuseMap field of the mediaboard, and click “Save item”.
Using a sprite sheet
In the sunken lounge template you may have noticed a flickering fire. The fire is a mediaboard referencing a single image.
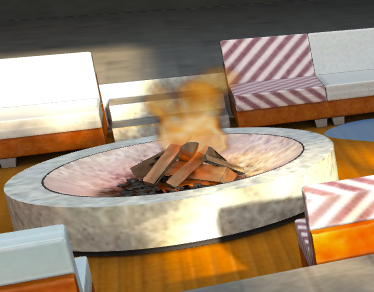
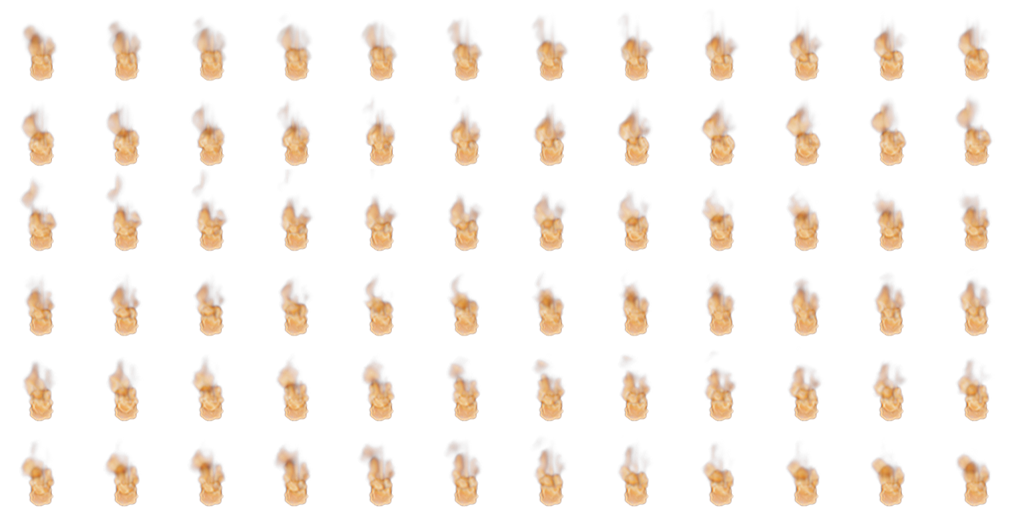
Every frame of the animation is in a row/column in the singular image
https://cache.learnbrite.com/_assets_/models/virtual_reality_vr_hall_gallery_fake_lighting/textures/flames.png |
Click Pencil+ > Add content
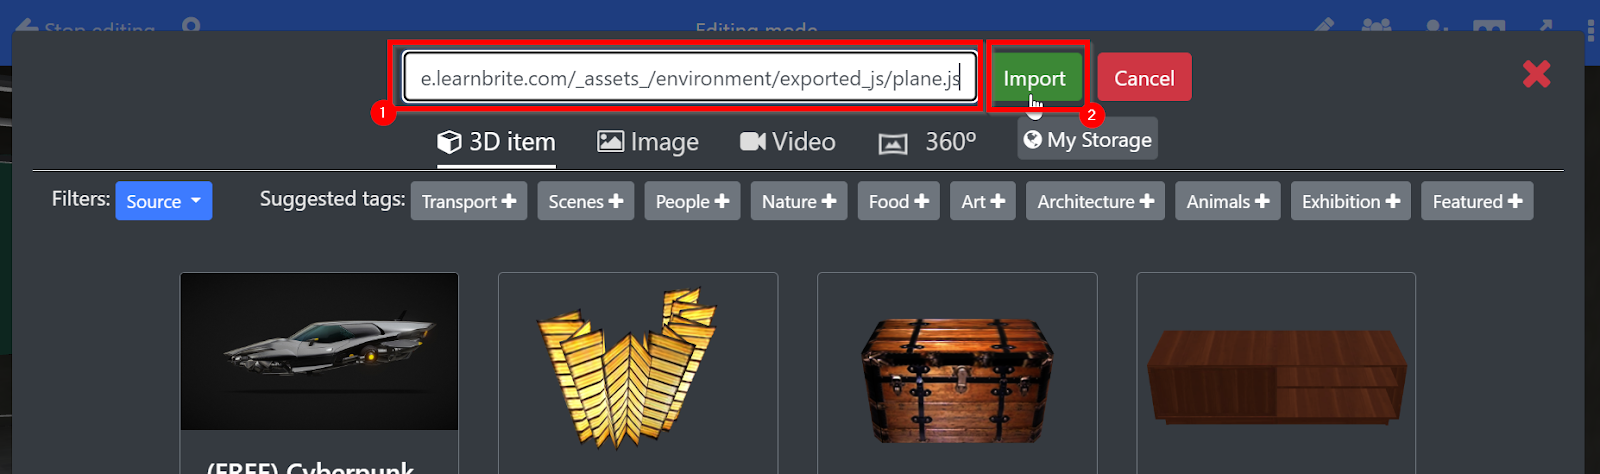
- Paste the following URL into the search field
https://cache.learnbrite.com/_assets_/environment/exported_js/plane.js |
- Click the Import button
- To use a sprite sheet paste the following to the diffuseMap field of the 3D plane
{"map":"https://cache.learnbrite.com/_assets_/models/virtual_reality_vr_hall_gallery_fake_lighting/textures/flames.png","cols":12,"rows":6,"frames":72,"fps":30} |
- Click the Save item button
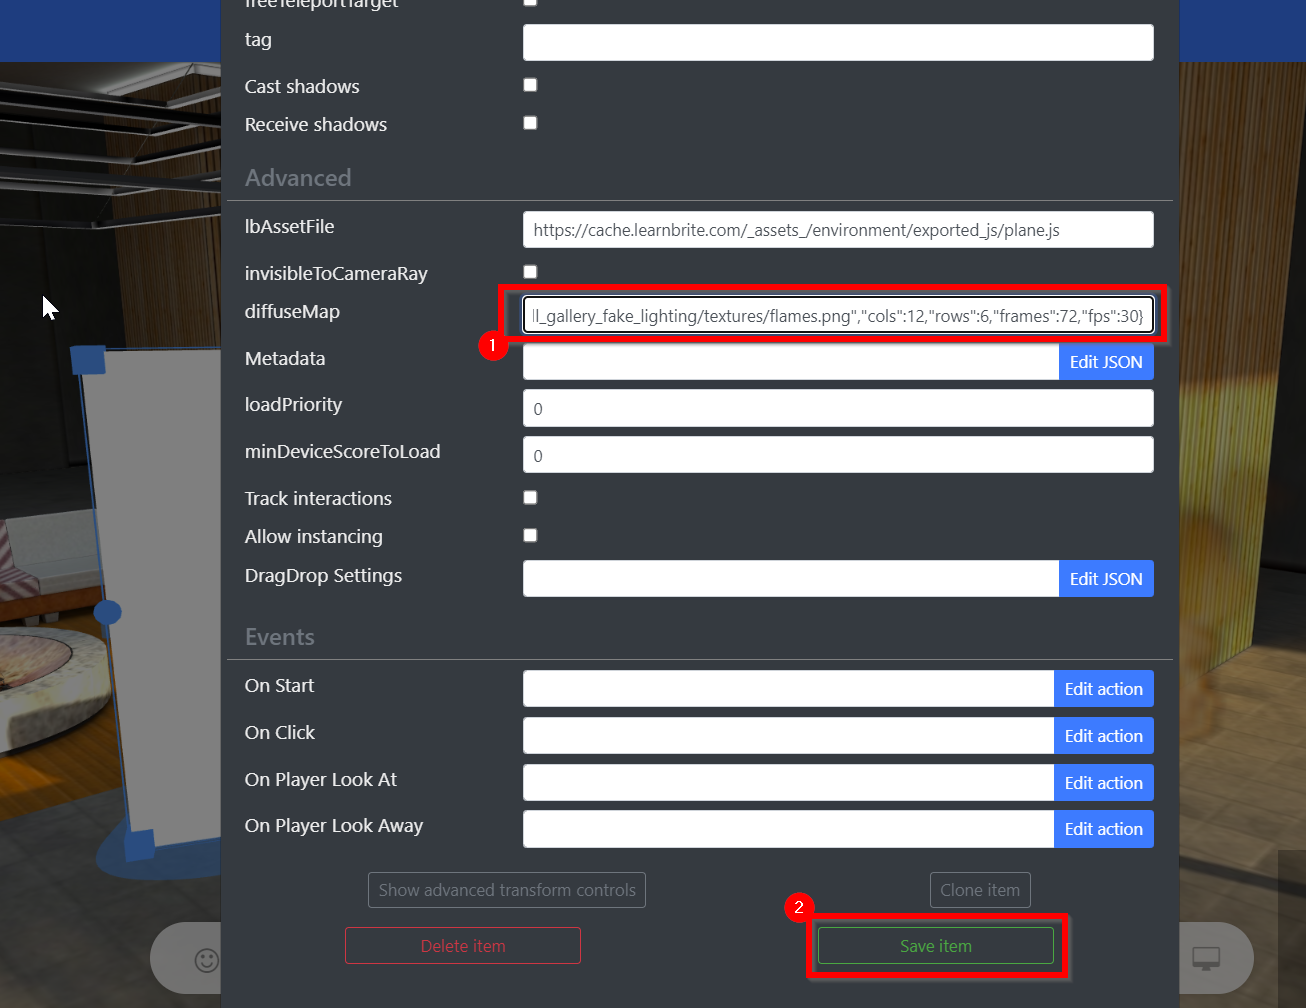
The diffuseMap fields are
map – URL of the sprite sheet image
cols – columns
rows – rows
frames – number of sprite image frames in the image
fps – frames per second to show, the speed of the animation cycle
I have the images but they are not online – where can I upload them?
Hyperspace offers a storage service which you can learn more about here Storage & Files
Webpages (snapshots)
Webpage links can be added to a 3D space by pinning the URL as a mediaboard.
The mediaboard shows a thumbnail image (snapshot) of the page and it is clickable to popup the website in an iframe where allowed or in a new browser tab if restricted by the website’s security policies. This is expected behavior and depends on the site's own security policies in regard to embedding their content. Note iframe display limitations in immersive mode
The Hyperspace Metaverse Platform includes a service that will visit the website and create a snapshot picture to put on the mediaboard.
Note that the website link must be publicly accessible in order to render a snapshot, the link also should not include any redirects as this may affect the snapshot tool.
Videos
Note: avoid videos in the DASH (Dynamic Adaptive Streaming over HTTP) format. To display them (or playlists) we suggest using a popup instead.
Adding a video through the chat (“pinning”)
If you are an Editor of the 3D environment, a quick way to add videos (and any other content) is to paste the URL in the chat, send the message, and then “pin” it by clicking on the red pin icon beside the message. We have recorded a brief video showing this in action:
{yt=4EmmrhRyVTs}
How to upload and play an MP4 video as a texture in the 3d scene
Upload the mp4 file to Hyperspace Storage, then click on the “World” icon on the right. This will copy the file’s global link.

Then, in the 3D environment, you can either paste the link in the chat and pin it (see “Adding a video through the chat” above) or use the “Add Mediaboard” option within the edit menu.
A quick video showing the link being copied and adding the mediaboard to the space can be found here:
{yt=EspBRpyYt_M}
Best performance for uploaded videos (mp4 to m3u8 service)
Recommended best practice to provide best video streaming quality to your audience is to deliver video as a HLS adaptive video stream (.m3u8 format). You can not upload m3u8 to the included Storage instead you must make a request to our support team to convert your mp4 in your Storage to m3u8. This service is only available to commercial subscriptions.
The support team can then convert (2 business days) that mp4 to an optimized HLS adaptive video stream (.m3u8). They will supply an .m3u8 url you can use to replace the .mp4 in your 3d scene.
You can then remove the original mp4 from your Storage as mp4’s can use a lot of space.
Using YouTube URLs
Although YouTube is great for experimental and proof of concept productions, occasionally the API may not respond. For commercial productions, we recommend using services such as Vimeo, or alternatively uploading your videos to our included platform storage. |
YouTube URLs work mostly like all others URLs, with a couple of quirks:
- To iframe YouTube videos you can't use the “watch” type URLs, as iframing is blocked by YouTube. You will need to modify the URL:
- From: https://www.youtube.com/watch?v=3E7hkPZ-HTk
- To: https://www.youtube.com/embed/3E7hkPZ-HTk?modestbranding=1&rel=0&autohide=1
Disable suggested videos when pausing or at the end
Use the parameter
rel=0 |
Example
https://www.youtube.com/embed/3E7hkPZ-HTk?modestbranding=1&rel=0&autohide=1 |
Using Vimeo URLs
Video Resolution
You can request a specific resolution of a vimeo video using a url parameter, this is useful for forcing faster loading/playback performance (at the expense of quality):
- https://vimeo.com/229643605?res=2k
- https://vimeo.com/229643605?res=1080
- https://vimeo.com/229643605?res=4k
Privacy Settings
Be sure to check the video privacy settings are not restricting video playback.
DASH Video Format & Playlists
Some videos on Vimeo are in this format and will not play as a texture in a space, we suggest using a popup to display videos that are in DASH format or are Playlists.
If you have Vimeo Pro account you can use .mp4 and Live Streaming links as described here https://help.vimeo.com/hc/en-us/articles/224823567-Third-party-player-links
Vimeo Live
When using Vimeo Live, note that Vimeo will generate different URLs before and after the video has gone live.
If you generate an RTMP destination before the video is live, Vimeo will generate a URL that includes /event/ . However, when the video goes live, a second URL is generated that does not include the /event/ part. It’s therefore best to insert the Video in the 3D environment after the video goes live.
Video textures (MP4, YouTube, Vimeo) on IE11 (2.8+)
Video textures are not supported in IE11, so MP4, YouTube, Vimeo and other videos will not play in mediaboards or 360s. An error will be generated only when the video is triggered to play (the space can still load without issue).
Clicking a video texture to play will crash IE11 with the following error
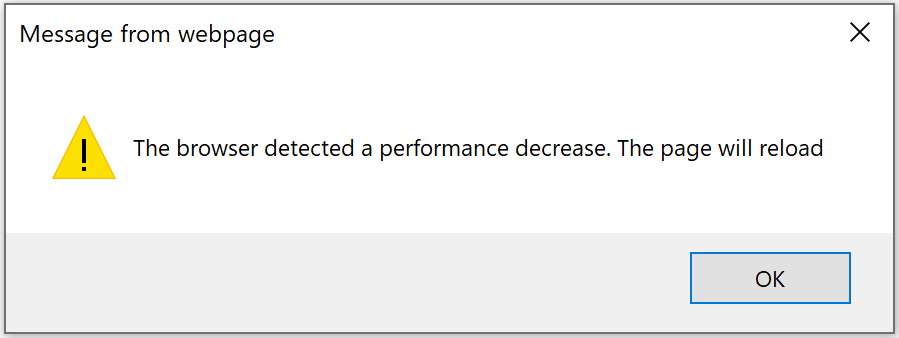
Video Play & Pause
Identify the name of the target mediaboard by clicking the setting icon for the object. The unique name will be at the top of the popup.
E.g. Mediaboard_xo2p
Then use the scripts below using the name of your mediaboard in the video field
Using a Script to Play
LB.Actions.setVideoboardControls({videoProxy:false,video:"MEDIABOARD_NAME",videoForcePlay:true,executedFromEA:true}); |
Using a Script to Pause
LB.Actions.setVideoboardControls({videoProxy:false,video:"MEDIABOARD_NAME",videoForcePause:true,executedFromEA:true}) |
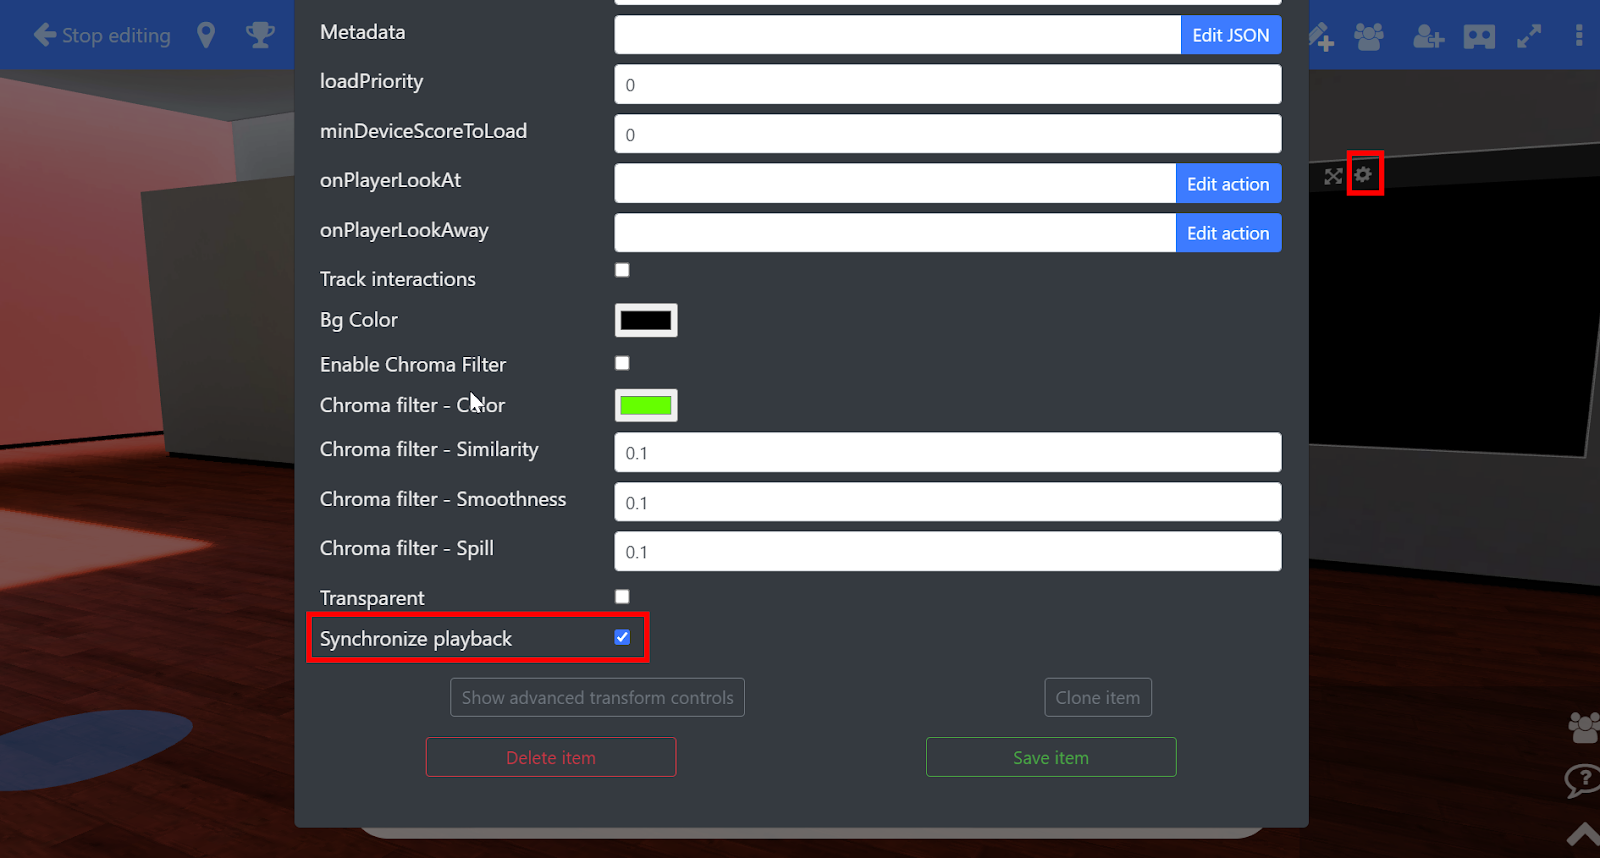
Synchronize playback
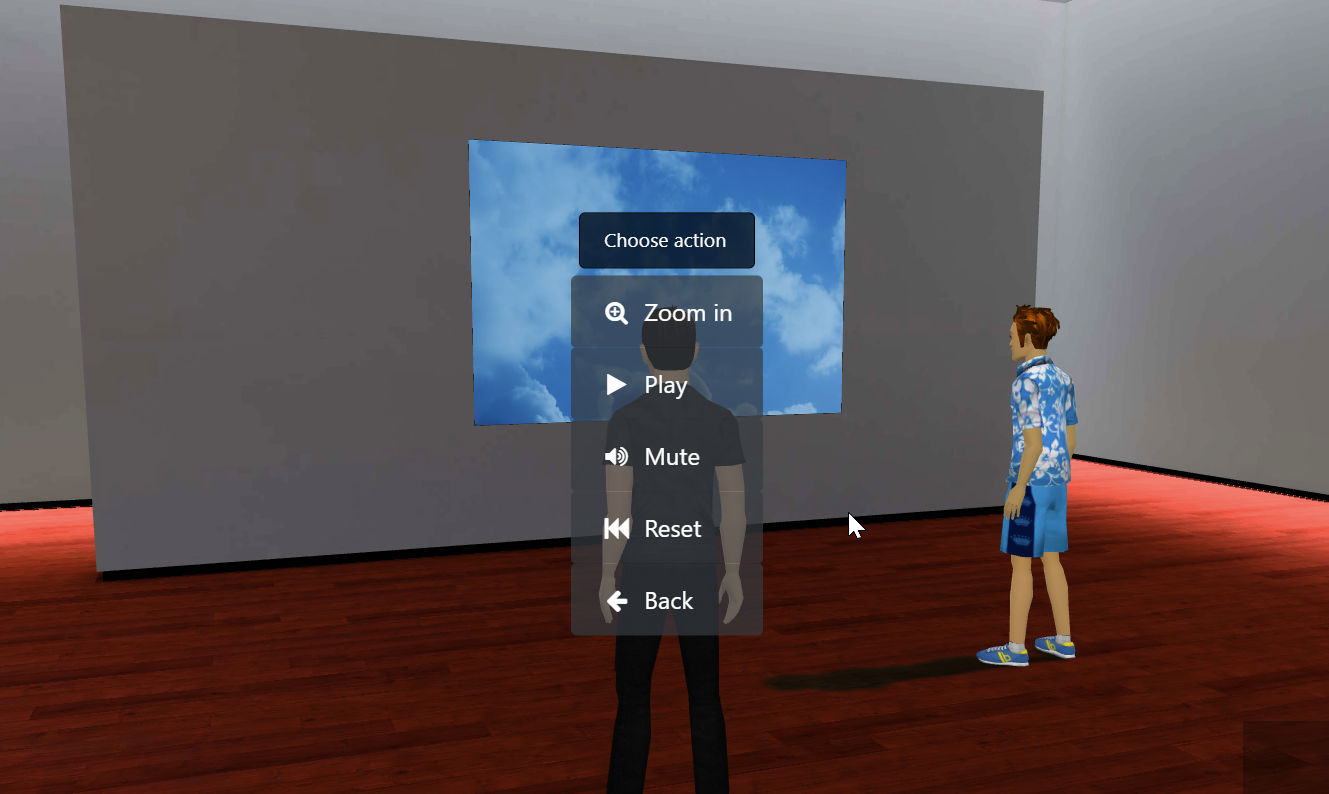
By checking the synchronized setting you can allow presenters and editors to play the video for everyone in the space. Anyone joining later will see the video at the same spot as everyone else.
As a presenter or editor you can Play, Pause and Reset the video. These choices will reflect for all other participants in the space. Zoom in and Mute are available to all participants and only apply to each participant's own experience.
When finished with a synchronized video we recommend
a) Pause it and
b) Reset it to the beginning
This "state" will be what is stored on the server so when a user enters later they won't get a message that the video should still be playing.
Note: Don’t assume at the end of the video it's finished for everyone, there can be a small divergence over time depending on people's bandwidth. So wait a few seconds before resetting.
The available controls can be changed to apply to different rules by adjusting the onclick action
When using a synchronized video we recommend disabling video controls for participants and leaving them enabled for presenters.
Add the following parameter to the onclick action
,"videoControlAllowedRoles":"Staff,Owner,Editor,Presenter" |
See more details here about videoControlAllowedRoles and videoSyncAllowedRoles.
Autoplay
Some videos can be set up so that they immediately start playing when the environment has loaded. To do this,
- Click Edit menu, enter edit mode
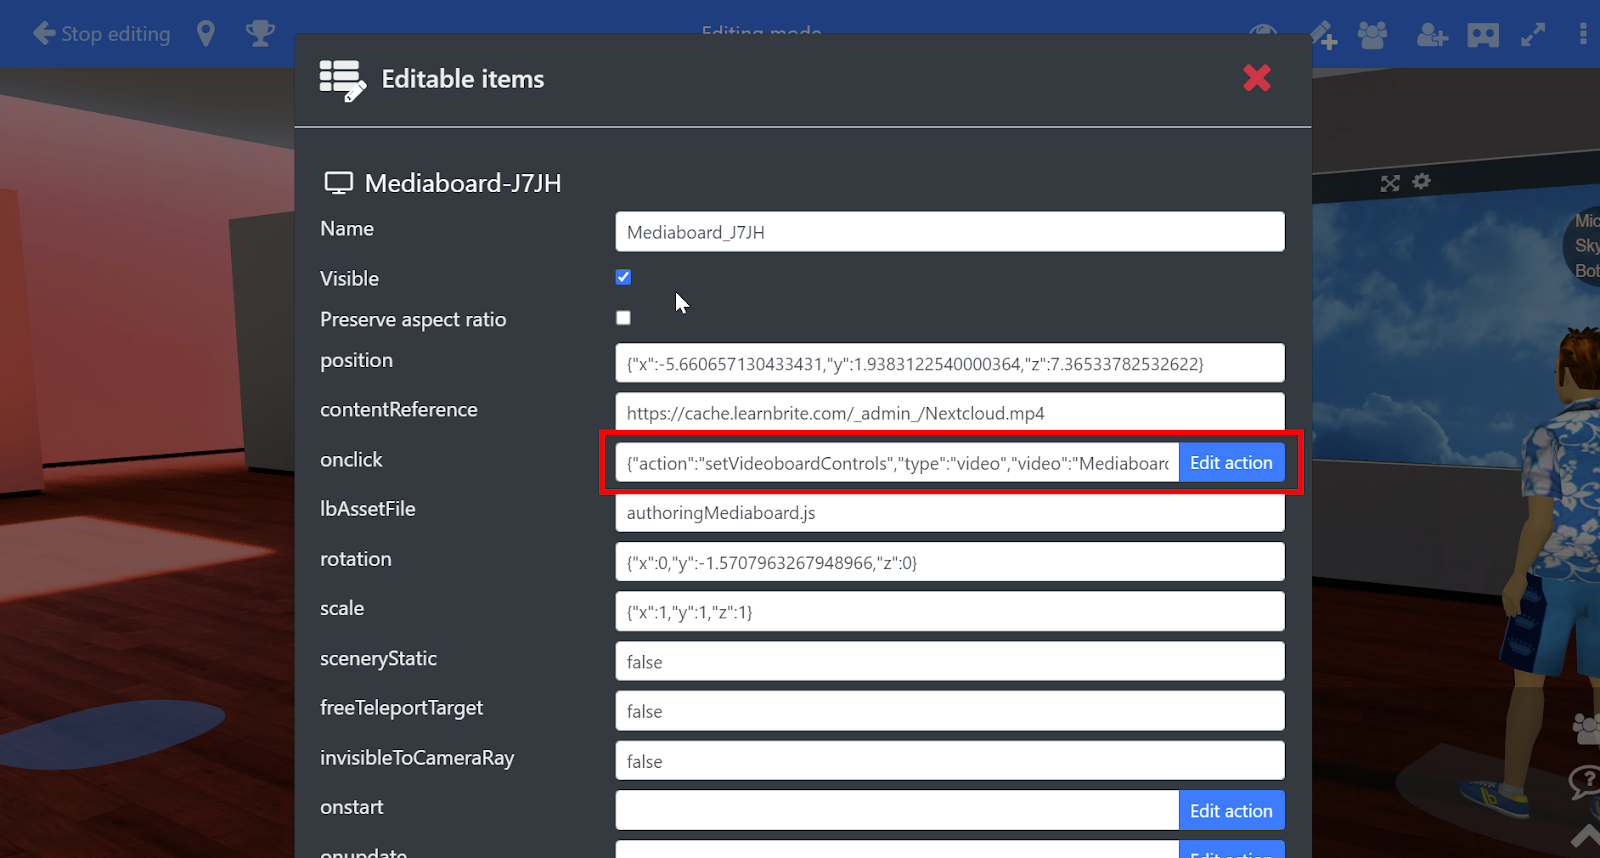
- Hover over the mediaboard, then click on the cog icon
- Copy the contents of the onclick field – they should start with {"action":"setVideoboardControls"
- Paste them into the onstart field
- Click Save
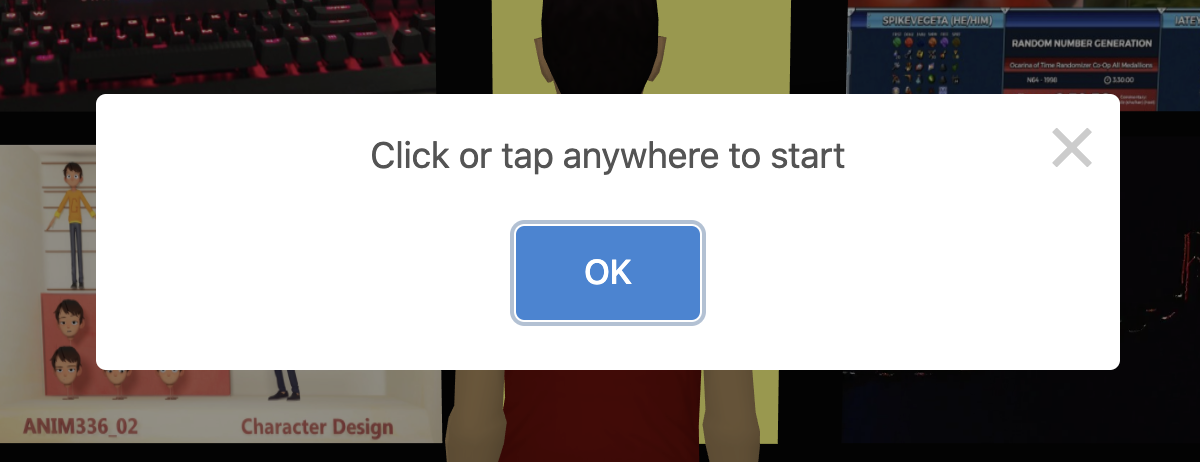
Note that browsers restrict this functionality by preventing any video with sound (or audio) to play unless the user interacted with the page in some way first, e.g. with a click or tap.
Therefore, on versions 2.13 and earlier, only muted videos will be allowed to autoplay. From version 2.14 onward, if playback fails because the user has not interacted with the page a popup will be shown with a “start” button. The videos will start playing as soon as the user interacts with the page, whether they clicked on the button or dismissed it.
Setting a thumbnail
To avoid this you can use a poster parameter with the URL of the video, by adding the following to your URL: ?poster=URL_OF_IMAGE
So for instance, if your video has the URL:
https://cache.learnbrite.com/my_video.mp4 |
you can add a thumbnail by updating it to:
https://cache.learnbrite.com/my_video.mp4?poster=https://cache.learnbrite.com/my_image.jpg |
Note poster images will respect the chromakey settings, so a green screen poster image would be transparent as expected.
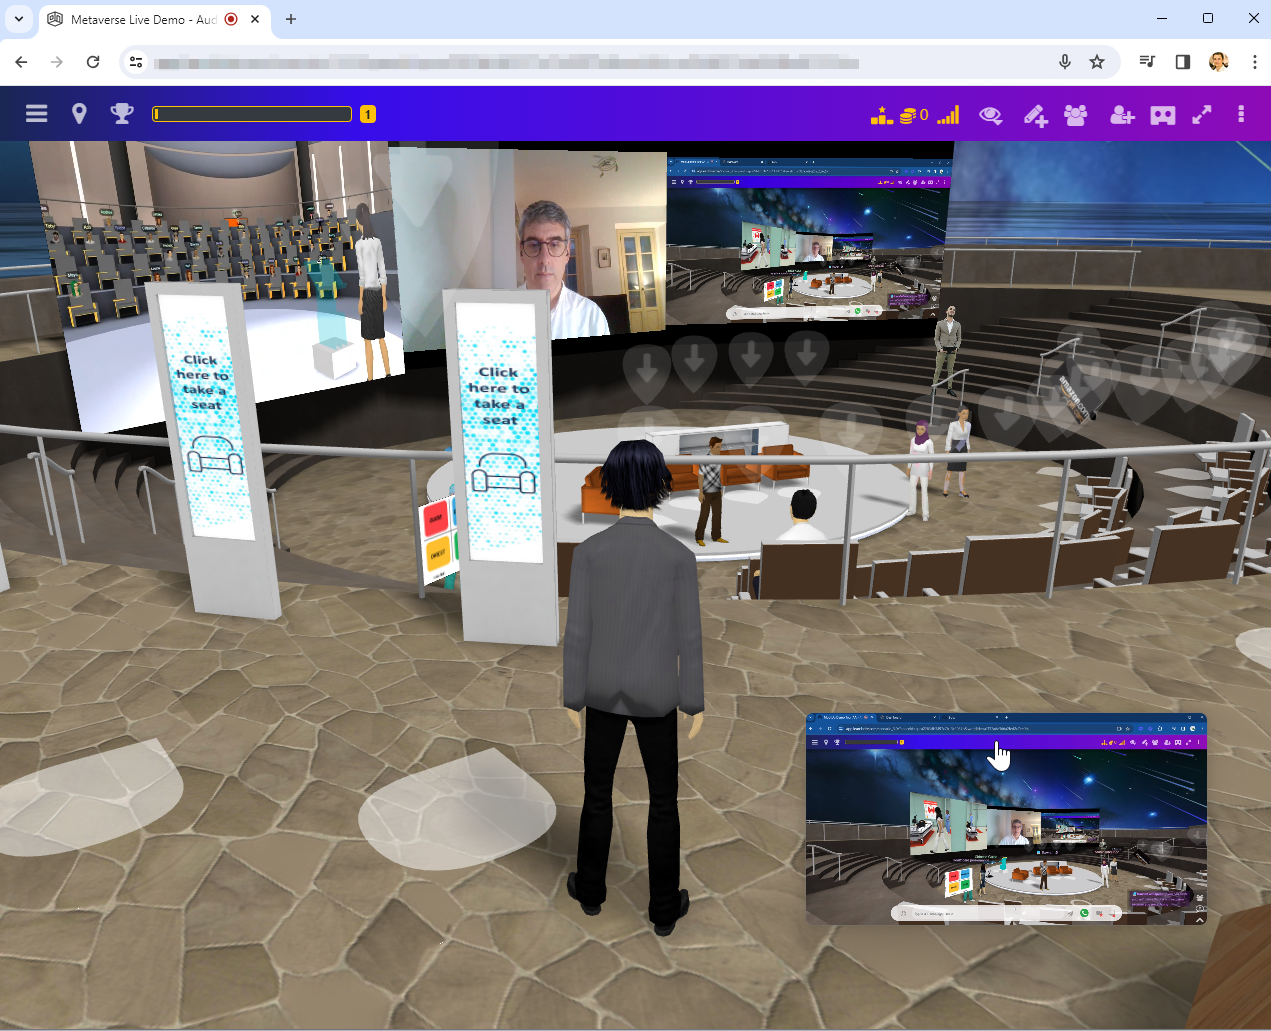
Picture-in-Picture
See the Picture-in-Picture guide
Live Video Streaming
Using your webcam
In the 3D scene
- Click Edit menu
- Click Add mediaboard icon
- Choose "Share screen" tab
- Click "Make screen share" button
- Click and Drag to move the screen to where you want it placed.
- Stop Editing, click the video icon in the chat toolbar to start live video.
Video Avatars
Using the Avatar as Videoboard feature
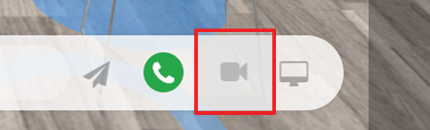
- Click on the Camera icon in the chat bar.
- Select the Mediaboard dropdown (applies to version 2.12 – 2.18. For version 3.0+, skip to step 4.)
- Select Avatar as Videoboard
- Click Start


Stop Avatar as Videoboard feature
- Click the Camera icon in the chat bar. Icon will be marked with a red “x”.
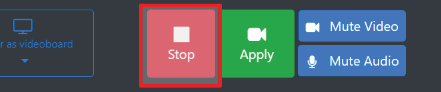
- Click Stop
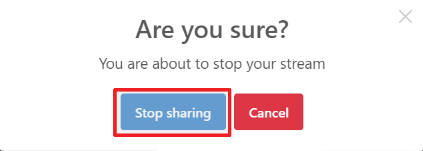
- In the “Are you sure” pop-up, click Stop sharing

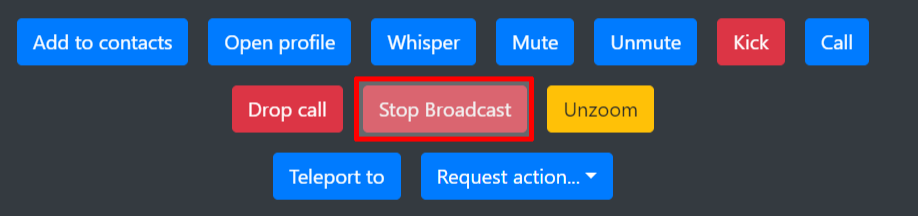
Stop Avatar as Videoboard for Presenters
- Click on participant
- Click Stop broadcast
Or
- Expand the menu on the top left
- Select Participants
- Find participant and click Stop broadcast


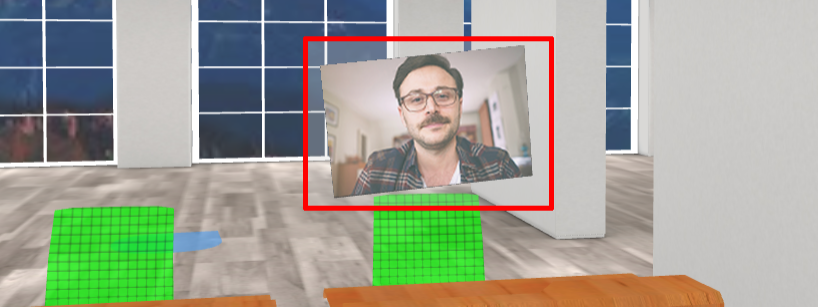
Holograms
Chroma key is used to remove a background from the subject of an image or video.
Chroma keying can be done with backgrounds of any color that are uniform and distinct, but green and blue backgrounds are more commonly used because they differ most distinctly in hue from any human skin color.
Note: Avoid any part of the subject being the color used as the backing, or that part may be erroneously identified as part of the backing. Eg. If you are using a green screen background, don't also wear a green shirt.
Live Stream as Holograms
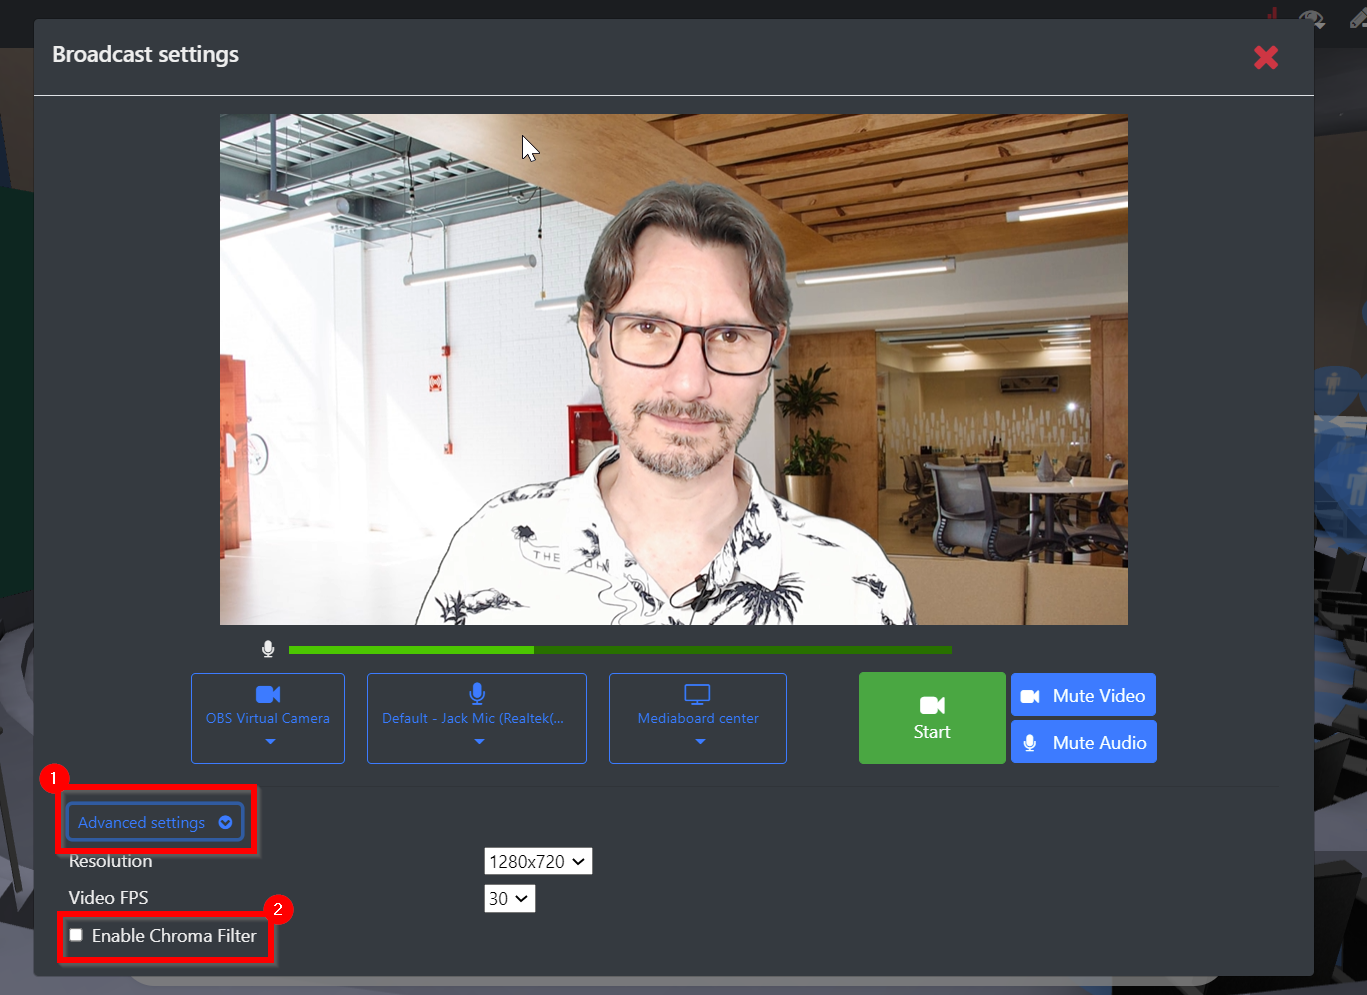
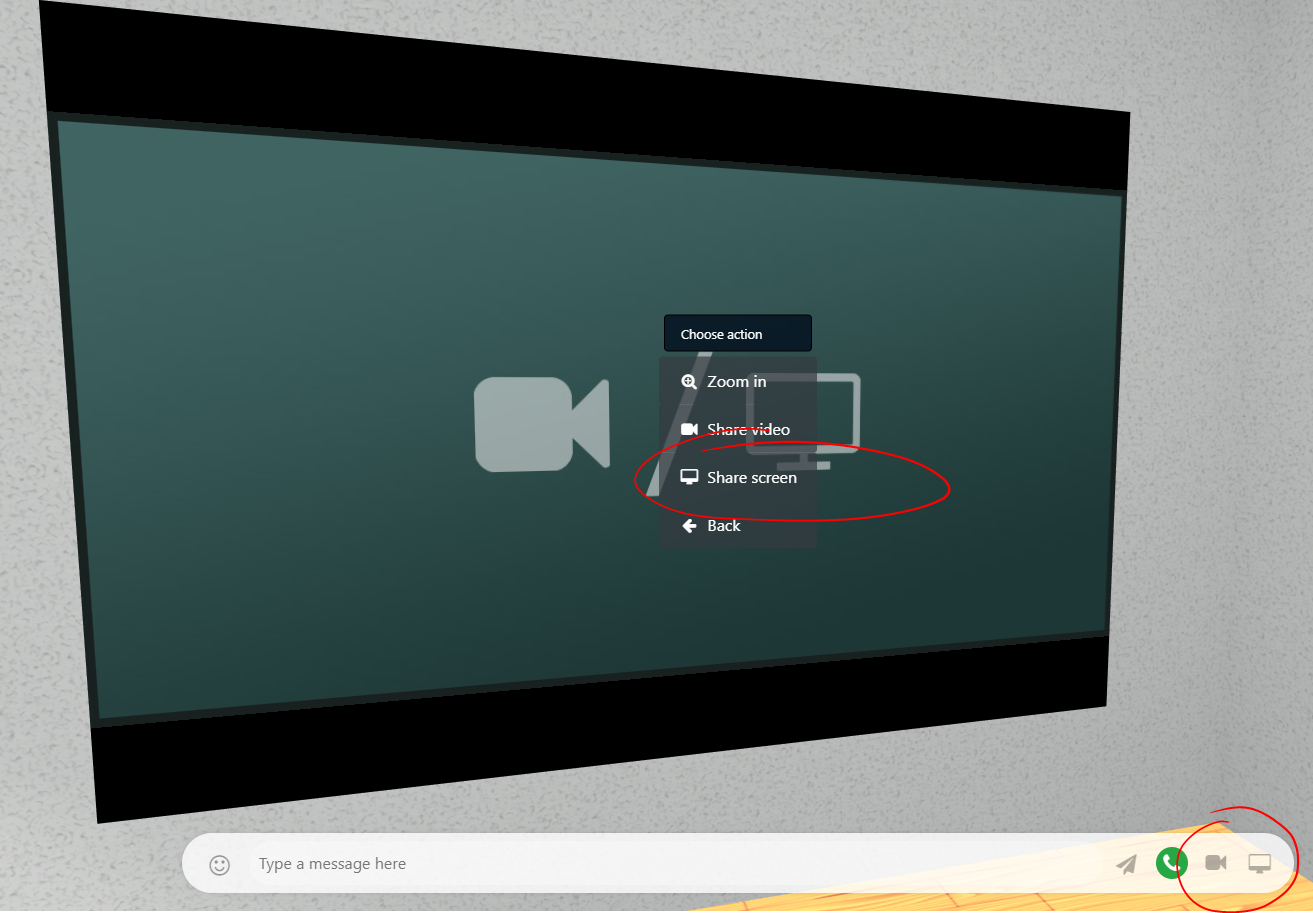
Click on a broadcast screen and choose Share Video
- Click the Advanced settings button at the bottom of the Broadcast settings popup
- Click Enable Chroma Filter
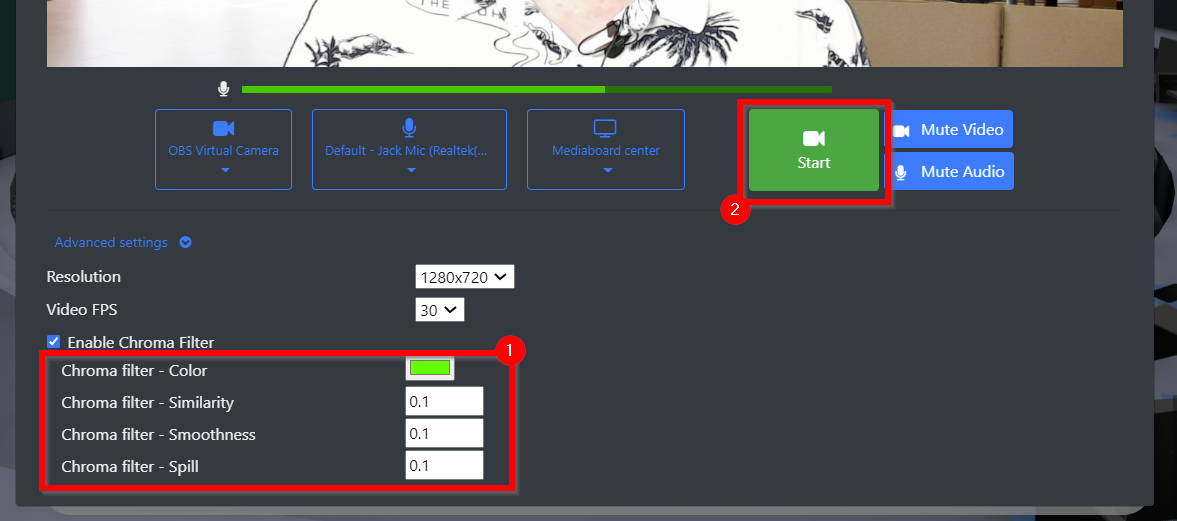
- Select the Chroma filter – color that best matches your background screen color
- Adjust the Similarity, Smoothness and Spill parameters for best results. Try values of 0.1, 0.2 and 0.3 in each
- Once the preview looks good click the Start button
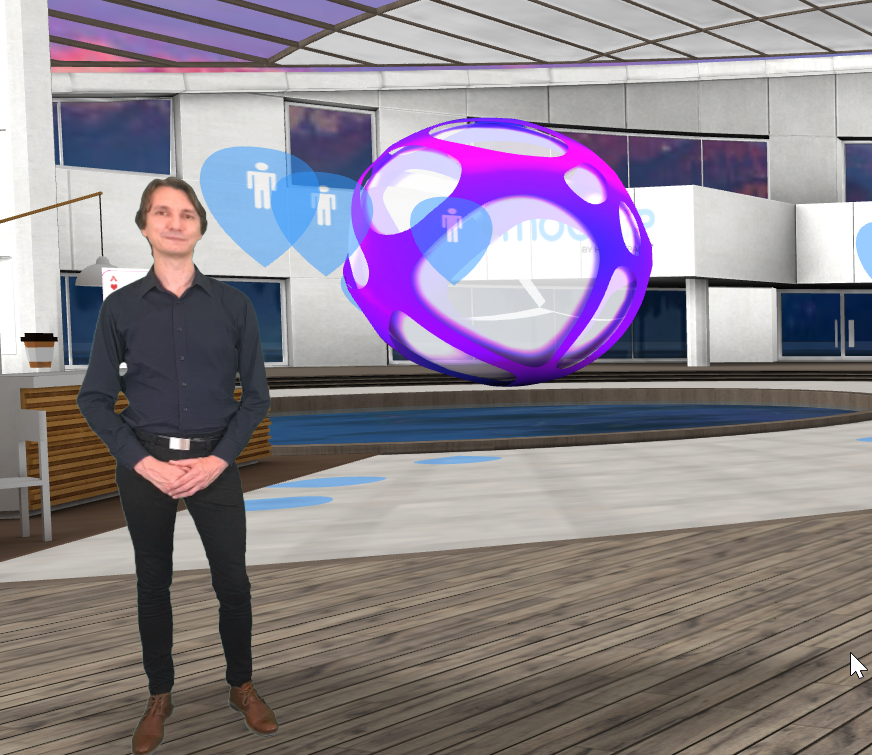
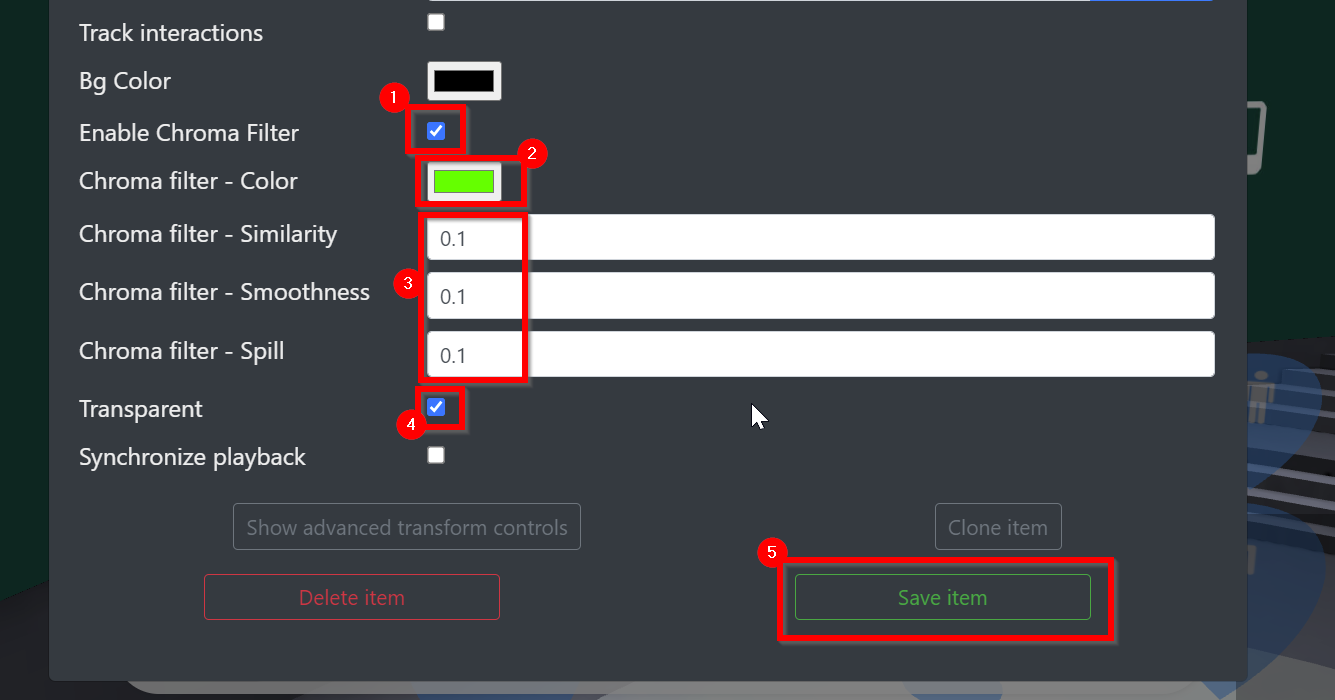
Pre-recorded Videos as Holograms
To configure the chroma key on any mediaboard edit its settings in edit mode by clicking the Settings Icon or using the Show items list on the Pencil+ menu.
- Enable Chroma filter
- Select the color that best matches your background screen color
- Adjust these parameters for best results. Try values of 0.1, 0.2 and 0.3 in each
- Enable Transparent
- Click the Save item button
To make the hologram visible in the space before the video starts playing, use a poster thumbnail as described here.
Third Party Streams
Other services can be used to provide streams into the platform. If you would like to use a specific provider and don’t find it listed here contact our support for assistance.
Wowza
See the guide here
Twitch
If you are using Twitch, you can paste your personal Twitch URL – e.g. https://www.twitch.tv/your_twitch_username – in chat and click the pin icon or using “Add Mediaboard” through the edit menu. That will show your current broadcast in the newly created Mediaboard.
YouTube Live
YouTube Live URLs have been tested successfully. Add the URL of the live stream via chat or Add MediaBoard in the edit menu: open the edit menu, then click “Add mediaboard”, insert the URL directly in the input field at the bottom of the popup, then click “Create”.
Screen sharing
Screen sharing is only available to authors, editors and presenters. Participants or guests will not see this option unless you escalate their role.
Click on a screenshare mediaboard (pictured below) or the screen share icon in the chat bar at the bottom right of your screen.
Picture-in-Picture
See the Picture-in-Picture guide
Supported Browsers
Screen sharing is supported on most modern desktop browsers.
- Chrome **
- Firefox *
- Safari *
- Edge ***
- Opera *
* Audio sharing not supported as of September 2020
** On Windows and Chrome OS the entire system audio can be captured, but on Linux and Mac only the audio of a tab can be captured.
*** On Windows and Edge OS the entire system audio can be captured, but on Linux and Mac only the audio of a tab can be captured.
Source: https://caniuse.com/#search=getDisplayMedia
Chrome Browser Sharing Options
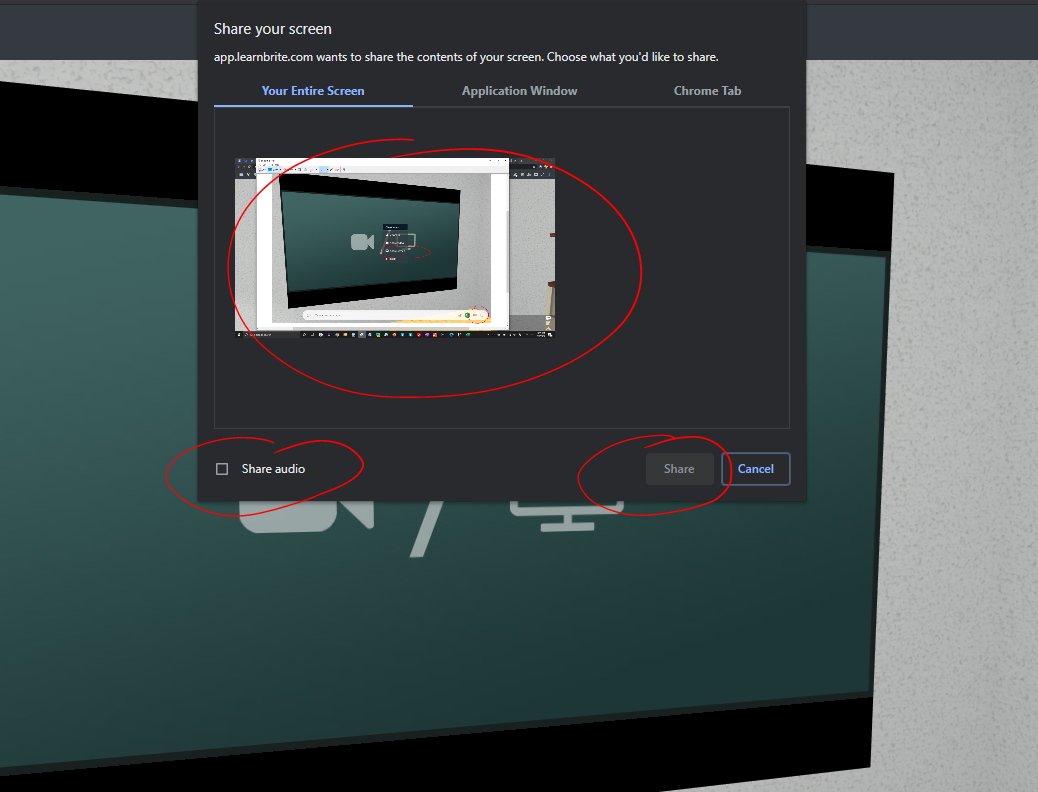
Share Your Entire Screen
To share your screen you must click on the picture first, this will enable the Share button.
There is an option to Share audio, check the box if you would like the audio from what you are sharing to also be heard by other participants.
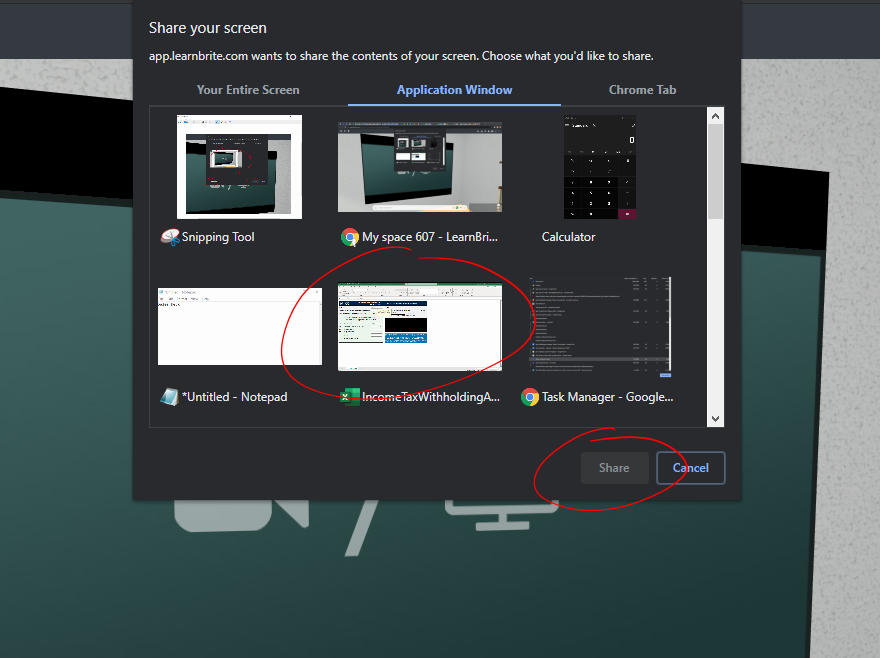
Share an Application Window
Click the application you would like to share, then click the Share button.
Note: Application Window sharing does not support Share audio
Share a Chrome Tab
Click on a tab to share, the Share button will become enabled then click on it.
There is an option to Share audio, check the box if you would like the audio from what you are sharing to also be heard by other participants.

Extension for Chrome (prior to version 70)
Note: Recent versions of Chrome (70 and up) do not require the use of an extension.
To share your desktop or screen with Chrome browser versions prior to 70, you will need to use the Chrome browser on a computer and install the LearnBrite Chrome extension found here: LearnBrite Screen Sharing (the latest versions of the Chrome browser does not require the extension to be installed).